WordPress is a popular content management system that allows users to create and manage their websites with ease.
One of the essential aspects of website management is uploading media files such as images, videos, PDFs, zip, and audio files. All these files are an important part of engaging a user, it also helps in not getting your reader bored. A photo can improve your article with a reader as well as from the SEO perspective.
In this article, we will guide you through the process of uploading media files on WordPress, step by step. Here is how you can upload media files on WordPress.
Page Contents
Make sure your image is ready to upload and follow the steps below to upload an image on WordPress:
-
Log in to your website’s WordPress dashboard
Open your web browser and navigate to your WordPress website. Log in to the admin dashboard using your username and password.
-
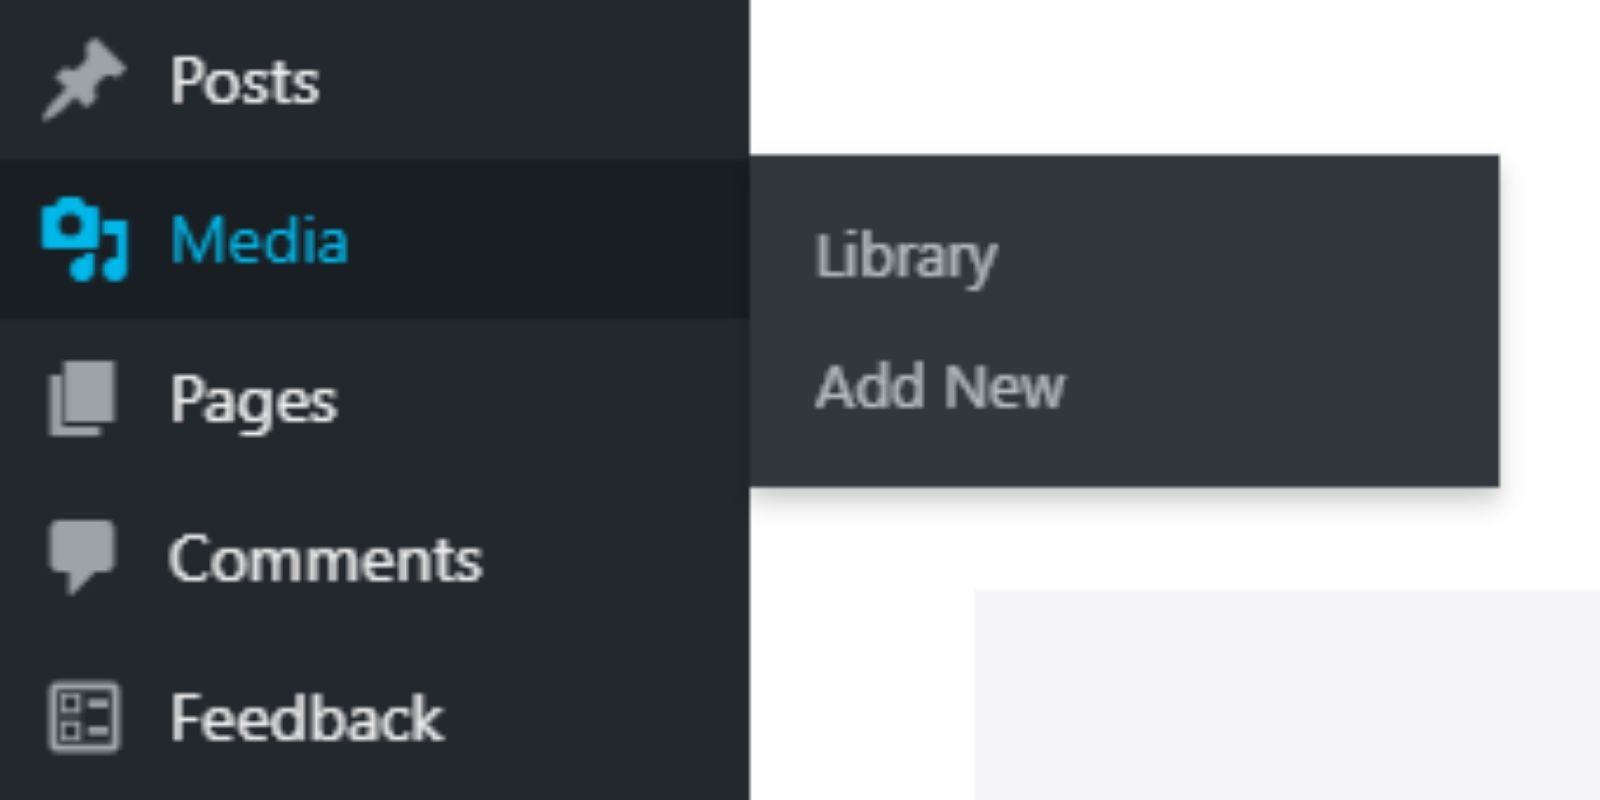
Find and Click Media on the left sidebar of the WordPress admin panel
Once you are logged in, look for the “Media” option in the left sidebar of the dashboard. Click on it to access the Media Library.
-
Go to ‘Library’ or click ‘New’
In the Media Library, you will see two options: “Library” and “Add New.” Click on “Add New” to start uploading your media files.
-
Upload photos by dragging them to the page or by clicking ‘Add New’
To upload photos, click on the “Select Files” button. This will open your computer’s file explorer. Locate the photos you want to upload, select them, and click the “Open” button. The photos will start uploading, and you will see a progress bar indicating the upload status.
-
Upload videos
The process for uploading videos is the same as photos. Click on the “Select Files” button, choose the video files from your computer, and click “Open” to start the upload.
-
Upload Files (PDFs, Zip, etc.)
To upload other types of files, such as PDFs or documents, follow the same process. Click on “Select Files,” choose the files from your computer, and click “Open” to begin the upload.
-
Wait till the upload completes
While uploading, please wait and refrain from refreshing or closing the browser window or the upload will be failed.
-
Add Titles, Alt Text, and Descriptions (Optional)
Once the upload is complete, you can add titles, alt text, and descriptions to your media files. This information helps with accessibility and SEO. To do this, click on the uploaded media file in the Media Library, and a window will appear where you can enter the necessary details.
-
Use the image where required within the article, page, or any place
After the media is uploaded and the details are added (if desired), you can insert it into your posts or pages. While creating or editing a post/page, place your cursor where you want the media to appear. Click on the “Add Media” button located above the text editor. In the media window, select the media file you want to insert and click on the “Insert into post” button.
-
Organize Your Media Library
To keep your media files organized, you can create folders and use tags. In the Media Library, click on “Library” to see all your uploaded media. You can then click on “Add New Folder” to create a new folder and drag and drop media files into it.
-
Manage Permissions (Optional)
If you have multiple users on your WordPress site, you can set permissions for media files. By default, uploaded media is accessible to all users. If you want to restrict access, you can use plugins or set user roles accordingly.
Not just single files, you can select and upload multiple files using the same process.
Note: Please note that uploading videos on your website is not recommended as they can make it slower, consume your web hosting’s bandwidth, and cost you hundreds and thousands of dollars in hosting bills.
That’s it! You have successfully uploaded photos, videos, and other files to your WordPress website using the Media Library. This is how you can upload media files, such as photos, videos, PDF files, and zip files to your WordPress websites. Now you can use them in your content to enhance your website’s visual appeal and engage your audience.

 In the Media Library, you will see two options: “Library” and “Add New.” Click on “Add New” to start uploading your media files.

![How to change (URL) permalink structure in WordPress [year] July 2025 5 How to change permalinks structure in WordPress](https://wpsack.com/wp-content/uploads/2022/08/change-permalink-structure-in-wordpress-768x384.jpg)
